Master Bathroom Makeover
Hey friends! So awhile back I talked about my plan to makeover my master bathroom. A couple of things, we aren’t into spending big bucks so that means that vanities and floors stay as is. So I worked around those key pieces. I love making over a space. Even if it’s just a mini -makeover, it can be a game-changer! So as you know if you have been following along, I love painting. OK – that’s kind of a lie, I love the results from painting. I am working with a friend on a new build and helping with the design aspects of the home. She is a yoga girl and constantly hears through her practice to enjoy the journey but she finds this hard to apply to a new home build. It made me think, I don’t typically find joy in the journey of DIY – or maybe I do for a minute but then I want to see my project completed. Still, find joy in the journey keeps running through my mind.
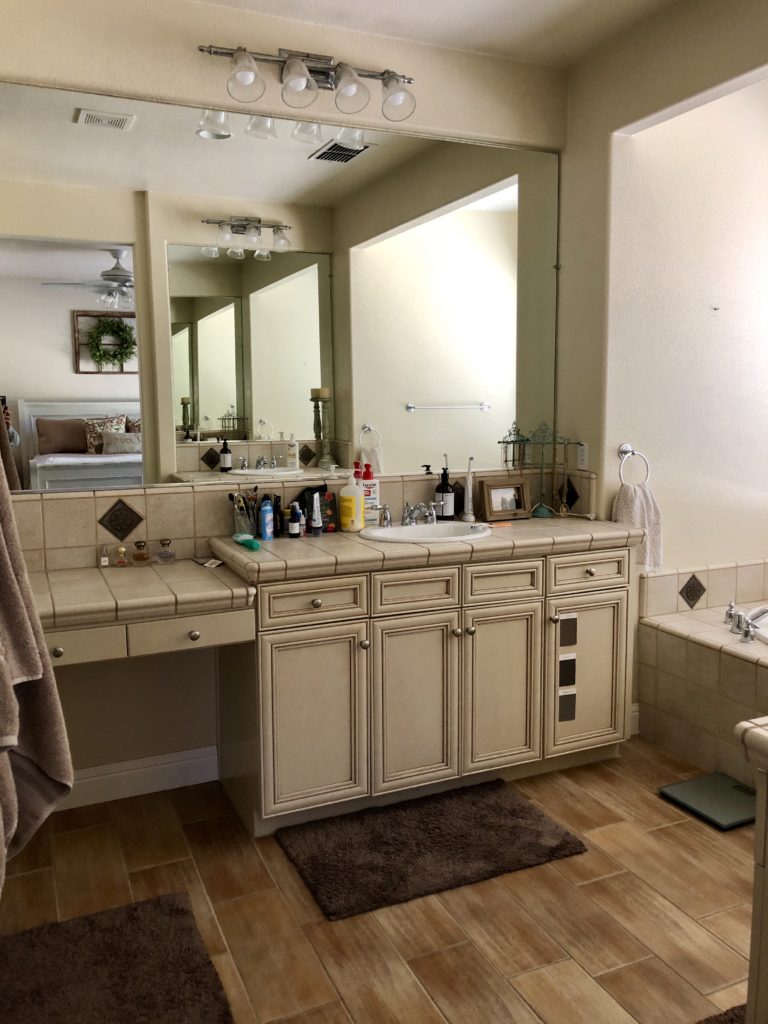
I knew I wanted to paint the walls, cabinets, take down the builder grade mirrors and replace them with big round mirrors, add shiplap to the walls where the mirrors were and switch out the light fixtures. I added in a few new decor pieces including a tray to hold all of my ‘daily basics’ and a big vase that I found on clearance. I also bought new bath mats. We had replaced the shower door earlier this year but it was more of a need and I didn’t feel like that was part of this ‘makeover’ so I didn’t get any pics of that. Sorry!
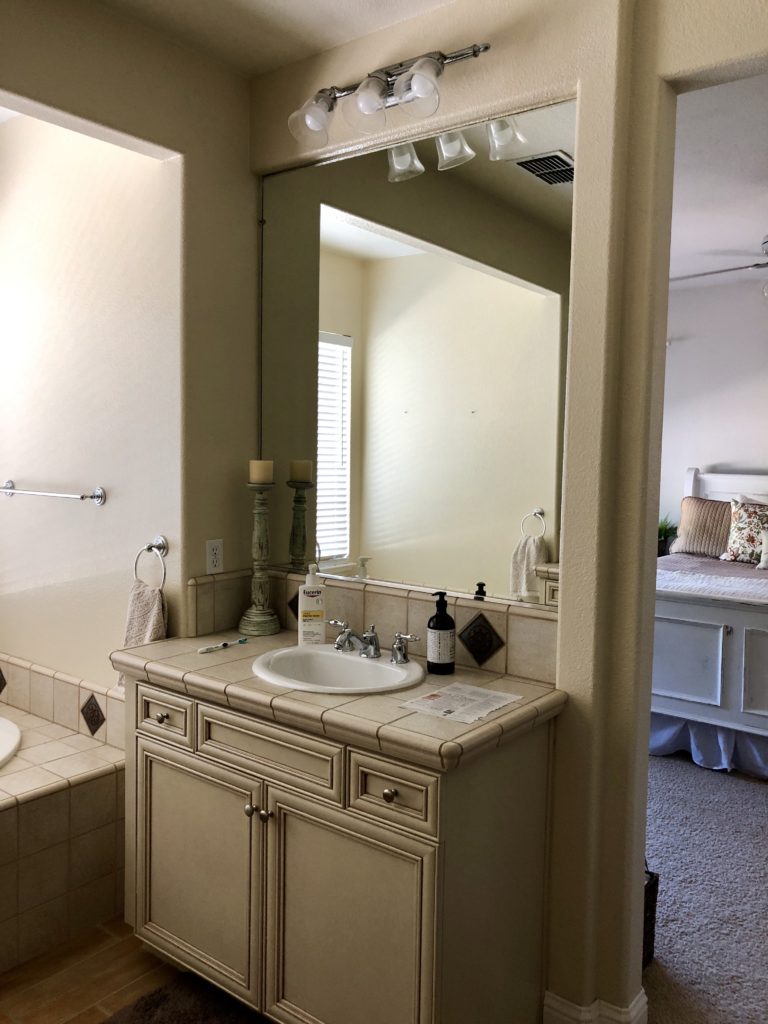
This is the bathroom before. Those mirrors kill me! One didn’t survive the removal process but the good news is that no one was hurt by the glass. Yikes!
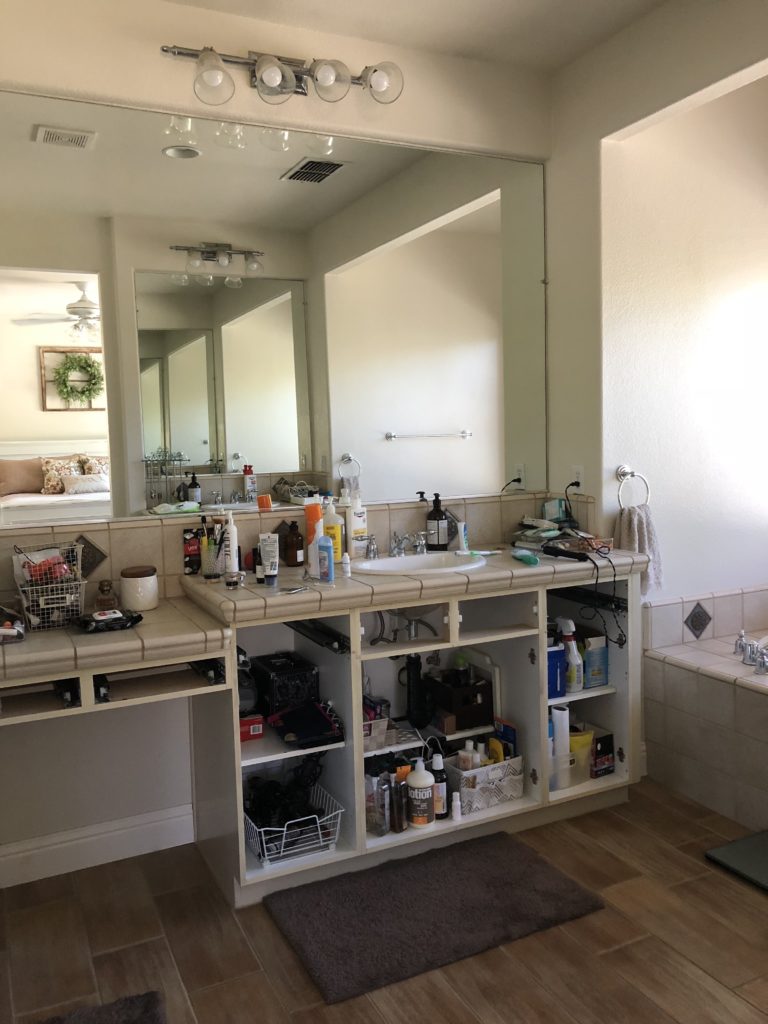
Next, off came the cabinet fronts. I gave them a good cleaning, a light sanding and then I used Kilz primer {2 coats} before adding Magnolia Wooden Pallete {also two coats}. Yes, I do have a lot of crap under my cabinets. I did actually purge and organize the whole space before the cabinets went back on.

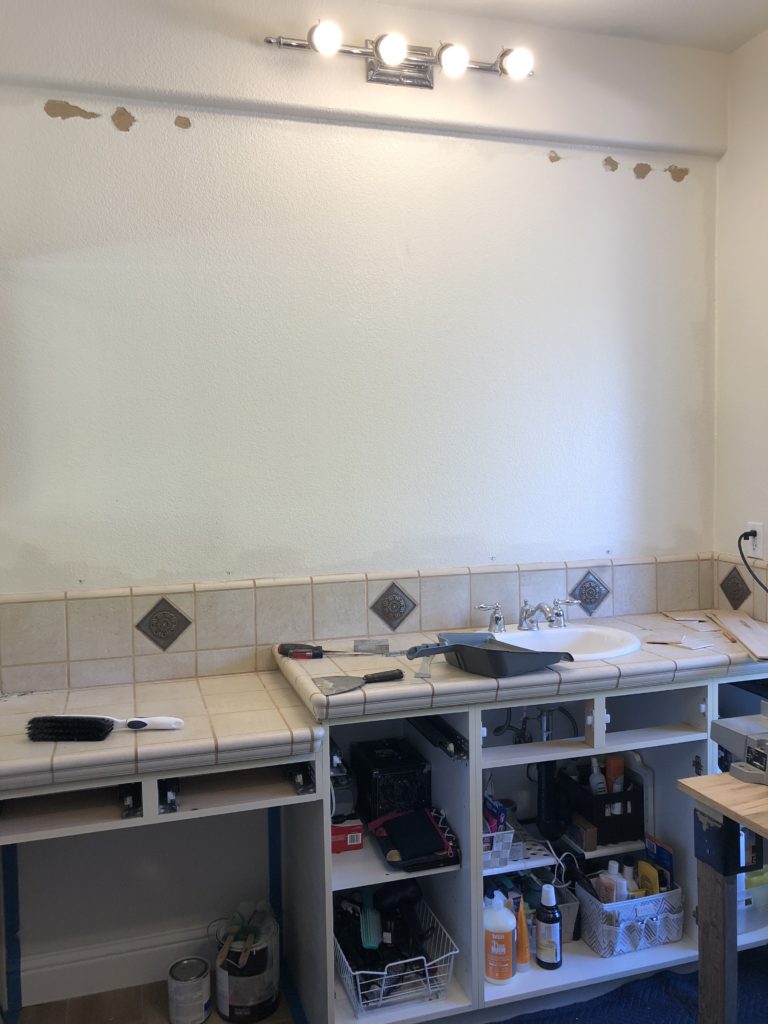
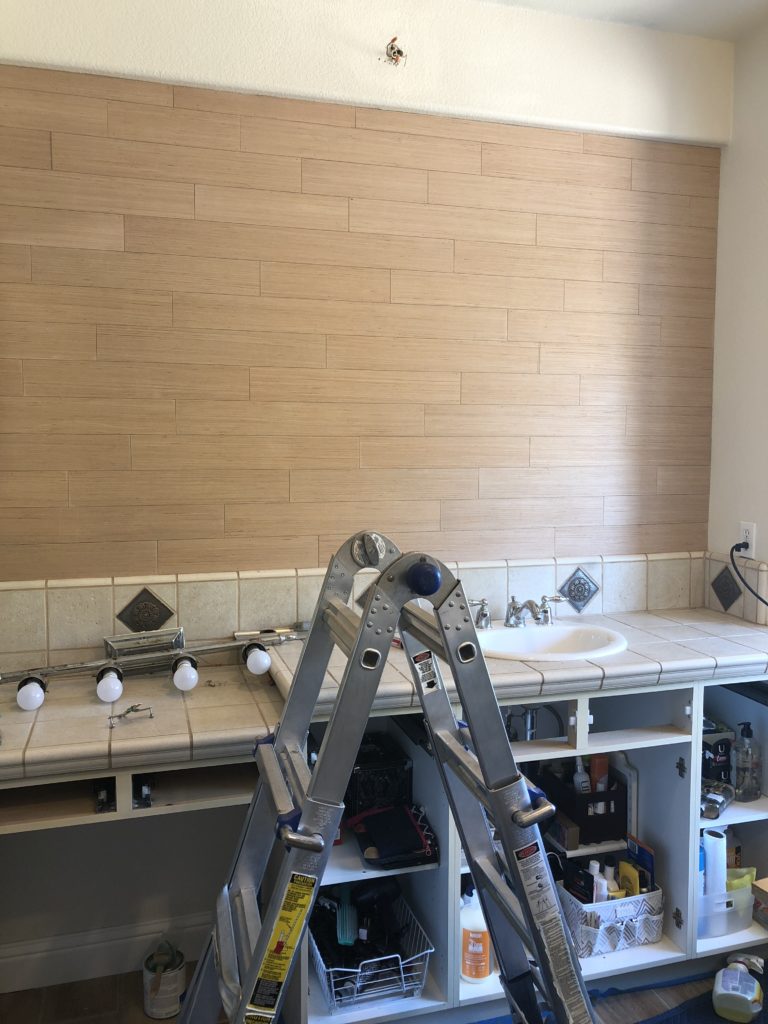
Goodbye giant mirrors!
My handyman is the best!! I come up with a project and he helps bring it to life. I am a lucky girl. Really. He only cusses a little about it. Ha!
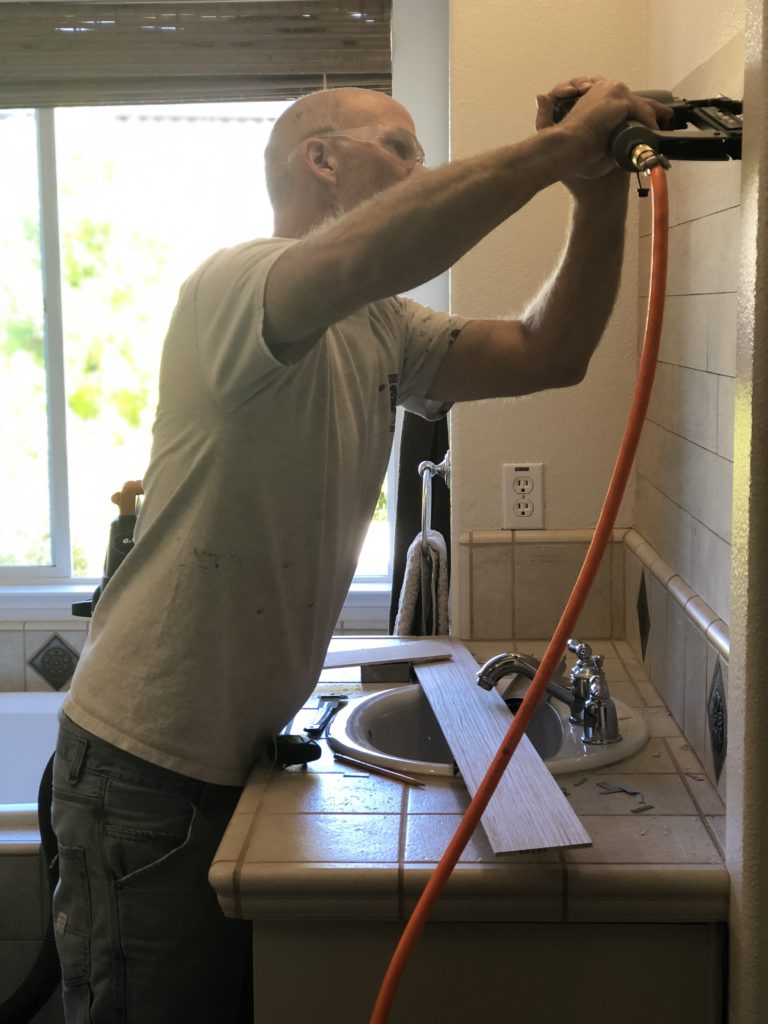
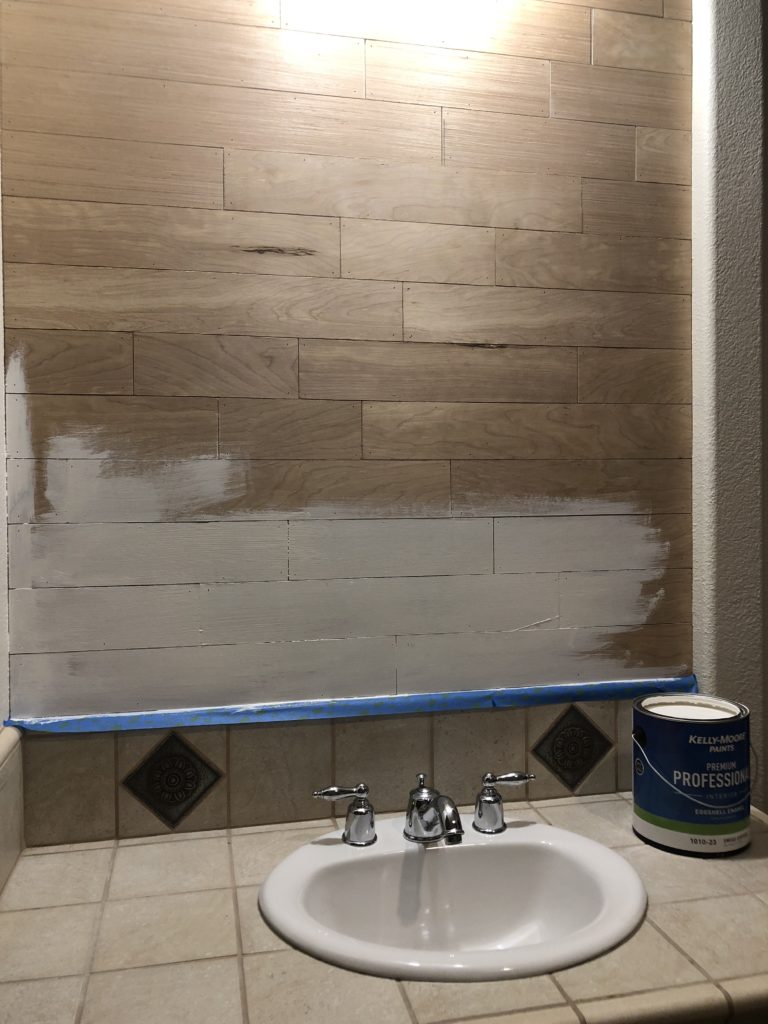
We use 5mm poplar plywood for our ‘shiplap’. My hubby cuts it into 4-inch strips and then cuts them into various lengths. Then I use Kelly Moore Swiss Coffee as my ‘white’.

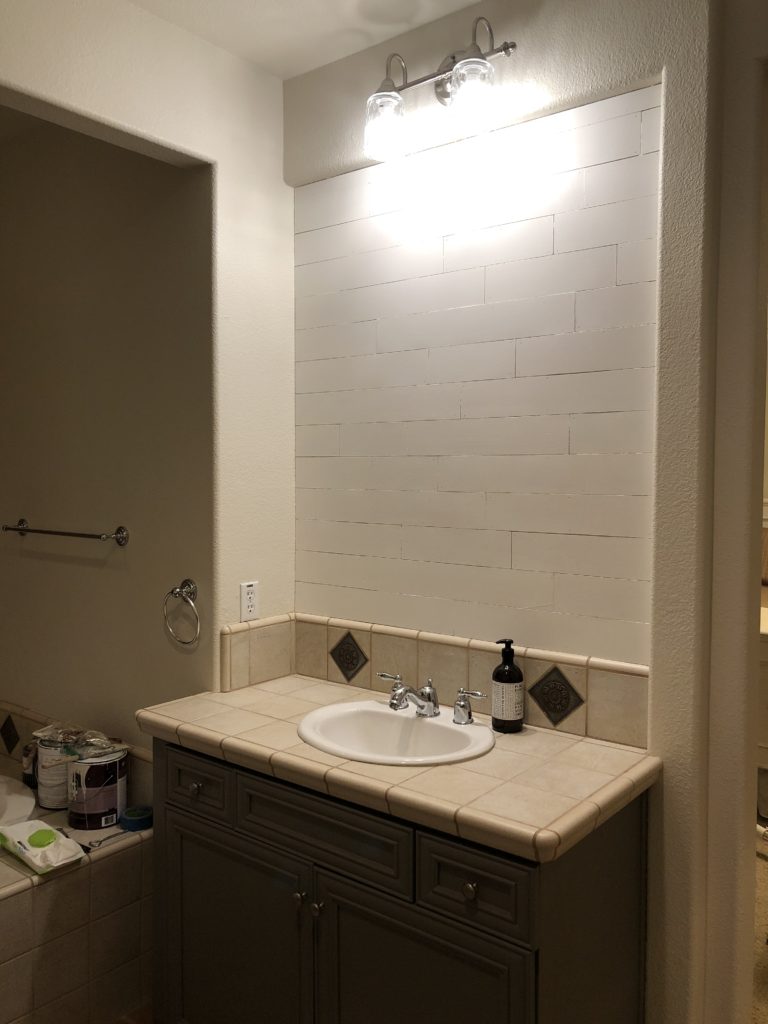
We had a bit of a hiccup with the light fixture over the main vanity. It was centered on the wall but that meant it was not going to be centered over the sink and new mirror. Sigh. We contemplated moving it but that meant it was turning into a bigger project and hey, sheetrock repair isn’t in our wheelhouse. So we decided to put up the light fixture and see if it really bothers us. So far, I’ve completely forgotten about it.
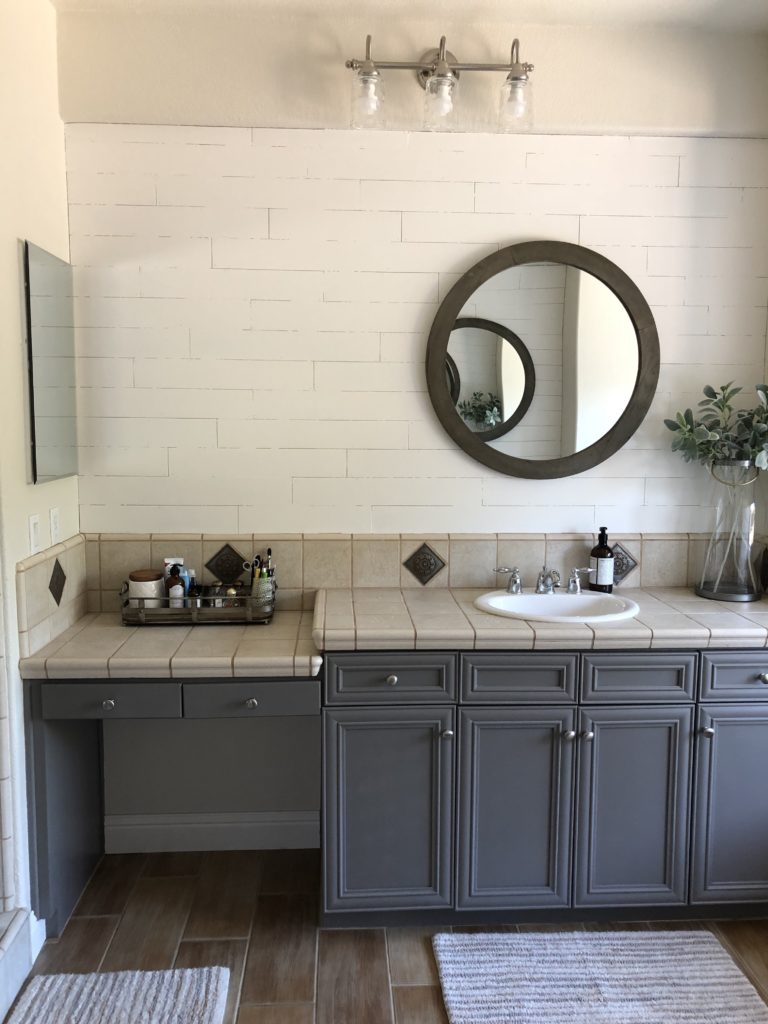


Another thing that I decided to do was eliminate counter clutter. I bought a wooden tray to house my daily essentials and everything else got tucked away. It makes the space feel so much neater. I scooped up the hand towels at Target. They are from the Opal Line which I am seriously crushing on. I found my new bath mats at Target too. I love that they have the grey from the cabinets and the tan from my floors to tie everything together. I picked up the large candle holder turned vase at Target as well. It’s part of the Magnolia line and it was on clearance for $18. A bunch of the Hearth and Hand is on clearance for 30% off. You should probably go shopping now that I’ve told you. #yourewelcome I picked up the mirrors at Home Goods and I am kicking myself for not getting a before photo. They started as a greyish-blue but I wanted to stay neutral so I just used some dark walnut stain over the top and now they look like barn wood. They were $50 each which wasn’t too shabby. I have the stain on hand as it’s a go-to for so many projects. We just used it on our newly built barn doors as well. The lights we chose were from Lowes. I picked out the shades separately. The total for the lighting was $111.
So where does that put us for this mini-makeover? The grand total was $411! It’s no $100 makeover but I feel like we still stayed at a pretty good budget for a makeover that really transformed the space. What do you think – could you redo a room in your house for this much or less? The lighting, rugs, and mirror were the most expensive things and even then, I was budget savvy in what I picked. There were a few other mirrors that I saw but they were $80+ but I decided that it wasn’t worth it to me. I had to buy a gallon of Swiss Coffee for the shiplap but I have enough for several other projects if my heart desires! That was $40 of my budget.
If money wasn’t an issue, what would I have done differently? After 14 years in this house, I am itching for some design changes. I would have gutted the space. Added a free standing tub, switched the tile in the shower, switched out the floors, I’d put in free-standing vanities with solid countertops instead of tile, maybe build in some storage where the lower countertop is as I’ve never sat there to do my makeup because that would imply that I actually wear makeup. 😉 I still love my shiplap walls and lights so those would go into a new space as well. Meanwhile, my money tree just doesn’t grow. I am thrilled with the changes we made and I love that it was such a huge transformation for not too much money.
If you are craving some design changes in your home, pick a space and start small. Paint is my #1 way to change a space. After that, add in some new decor and art. Your space will feel pretty! I promise. If you want a little more budget DIY inspo, check out my previous makeovers. I’ve redone my master bedroom, guest bath and guest bedroom.


It looks great Gabby! Funny…I recently bought the same rugs for our bathrooms. 🙂 I would love to do something like this in our kids’ bathroom and also our laundry room, which is very tiny and boring, except for the lovely windows. Hugs friend!
<3 Kristin
Looks great! I love those mirrors & the shiplap. Boy do I have design ideas for our bathroom updates. ?
Let me know if you need any input 🙂 BTW – HomeGoods is my decor BF!!